Have you ever glanced at the labels of raw meat in the supermarket and noticed the array of artificial preservatives? If you’ve been curious about how to keep your meat fresh without these additives, you’re not alone. Preserving meat naturally is a journey that combines practicality with the rewarding satisfaction of homemade culinary mastery. In this guide, we will delve into five natural methods that allow you to preserve meat at home, ensuring its quality and extending its shelf life.
1. Salt – The Simple and Time-Tested Method
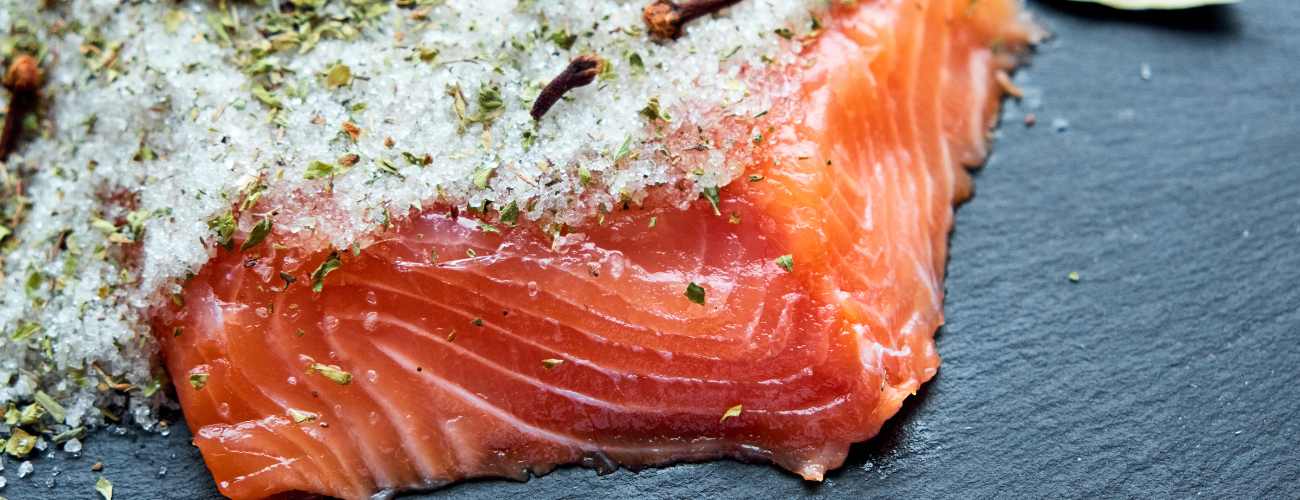
Salt is a time-tested method for preserving meat by removing moisture, creating an inhospitable environment for bacteria. This is my favourite method due to its simplicity.
Here’s how it works:
1. Start with pure salt, free from additional ingredients that may affect the process. I learnt that certain types of salt may contain additives that could interfere with the preservation process. So, check your label to ensure you are using pure salt only.
2. Apply an even layer of salt to the meat, avoiding excessive amounts. Many beginners tend to use too much salt, which can lead to a condition known as ‘salt scabbing.’ However, remember that the amount of salt that adheres to the meat is usually sufficient for curing. This is often referred to as the ‘saltbox method.’
3. For slimmer cuts of meat, use a dry salting method without letting the meat sit in the salt. You can place the meat on drying racks. For larger pieces, you can let it rest in the salt for a minimum of 5 days, with 7 days being ideal.
4. Once the meat becomes dry and rigid, rinse off excess salt and pat it dry.
5. Hang it in a cool, dark place for up to 5 days. This method is well-suited for making homemade bacon.
6. Slice your homemade bacon, fry and enjoy!
If you notice a white ‘scab’ on the meat, it may indicate an excess of salt. You can soak it in water to remove the excess salt, although it’s not always necessary. The presence of a ‘scab’ simply means that the salt concentration in that area is slightly higher than the rest of the meat and does not affect overall quality. So, no need to do anything apart from adding less salt to your meal.
Try this tested recipe:
| Recipe: Salt Preserving |
| Ingredients | Quantity |
| Salmon fillets | 2 salmon fillets |
| Kosher salt | 1 cup |
| Sugar (optional) | 1/4 cup (optional) |
| Fresh dill | 1/4 cup |
| Lemon zest | Zest of 1 lemon |
| —————————————- |
| Steps | Instructions |
| 1. Prepare the salmon: | Rinse and pat dry the salmon fillets. |
| 2. Mix the cure: | In a bowl, combine the kosher salt, sugar (if using), fresh dill, and lemon zest. |
| 3. Cure the salmon: | Spread a layer of the cure mixture in a shallow dish. Place one salmon fillet, skin-side down, on the cure mixture. Cover the salmon with the remaining cure mixture. |
| 4. Refrigerate: | Cover the dish and refrigerate for 24-48 hours. Turn the fillets once during this time. |
| 5. Rinse and slice: | Remove the salmon from the cure, rinse it under cold water, and pat it dry. Slice thinly and serve as gravlax. |
| Shelf-Life Details |
| Properly prepared and salt-preserved salmon can last in the refrigerator for up to two weeks. Ensure it’s tightly covered and kept refrigerated. |
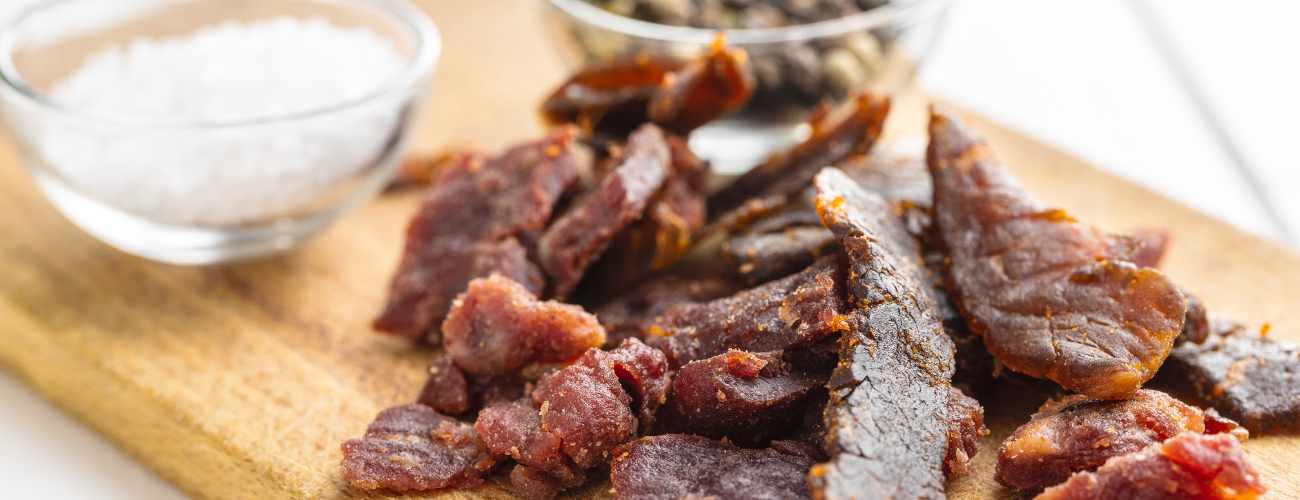
2. Drying Method: A Natural Approach to Meat Preservation
Have you heard of the term jerky? This is dried meat which can be a versatile and portable snack that can be enjoyed on the go or used as an ingredient in various dishes.
Drying meat is another natural and traditional method for preserving it. This technique involves reducing the meat’s moisture content to create an environment where harmful microorganisms can’t thrive. Another super simple method!
Here’s a step-by-step guide on how to dry meat effectively:
1. Start with high-quality meat. You can use lean cuts of beef, poultry, or even game meats.
2. Clean the meat thoroughly, removing any excess fat or connective tissue. If you’re using poultry, it’s essential to remove the skin.
3. It is important to slice the meat into thin strips or small, uniform pieces. The thickness should be around 1/8 to 1/4 inch.
4. While marination is optional, it can add flavour and depth to your dried meat. Create a marinade using your choice of seasonings, such as salt, pepper, garlic, and herbs, and allow the meat to marinate for a few hours or overnight.
5. Place the meat strips on a drying rack or dehydrator trays. Ensure there’s space between each piece for proper air circulation.
6. Set your drying temperature based on the method you’re using. Traditional air drying can take several days while using a food dehydrator can expedite the process. Typically, a temperature range of 130-160°F (54-71°C) is recommended.
7. Periodically check the meat’s dryness. It should be dry but still pliable, without any moisture remaining. The drying time can vary depending on the meat’s thickness and the drying method, usually ranging from a few hours to a few days.
8. Once the meat is adequately dried, let it cool completely. Then, store it in an airtight container or vacuum-sealed bags. Proper storage helps preserve the meat and maintain its flavour.
9. This natural preservation method allows you to savour your favourite meats for an extended period without the need for artificial additives.
3. Preserving Meat by Canning
Canning simply cannot be missing from our list as this is a time-tested method for preserving meat. It involves sealing meat and its juices in jars, making it shelf-stable for an extended period. This process helps prevent spoilage and allows you to enjoy your favourite meats throughout the year.
1. Gather Your Supplies:
To get started, you’ll need the following equipment and ingredients:
- Meat (beef, chicken, pork, or game meat)
- Canning jars and lids
- A pressure canner
- Seasonings (optional)
- Salt (for flavour and preservation)
2. Trim the meat, removing excess fat and bone. Cut it into appropriate-sized pieces for canning. Season the meat if desired.
3. Pack the prepared meat into the canning jars, leaving about an inch of headspace at the top. Do not overfill the jars, as proper space is crucial for the canning process.
4. Depending on the recipe, you may add water, broth, or sauce to the jars to enhance the flavour and moisture of the preserved meat.
5. Place the sterilized lids on the jars and secure them with bands until they are fingertip-tight.
6. Canning Process:
Water bath canning is generally not recommended for preserving meats, especially low-acid meats like chicken, beef, and pork. Water bath canning is typically used for high-acid foods like fruits, pickles, jams, and some tomato-based products. The reason is that water bath canning relies on the natural acidity of these foods to prevent the growth of harmful microorganisms. Low-acid foods, such as meats, have a higher risk of bacterial contamination if not processed correctly.
If you are interested to learn more about canning process for your harvest including high acid foods, I recommend to read my blog about easy canning and freezing tips for your garden harvest.
Using a Pressure Canner:
Follow the manufacturer’s instructions for your pressure canner.
Process the jars at the recommended pressure and time for your specific meat type. This ensures the meat reaches a safe temperature to kill bacteria and extend shelf life.
7. After the canning process, let the jars cool naturally. You’ll hear the lids pop as they create a vacuum seal. Once the jars are cooled, check the seals by pressing the centre of the lids. If they don’t pop back, the seal is secure. Store the sealed jars in a cool, dark, and dry place.
Canning meat at home allows you to enjoy your favourite cuts year-round and reduces waste. Be sure to follow safe canning practices to ensure the meat remains safe for consumption!
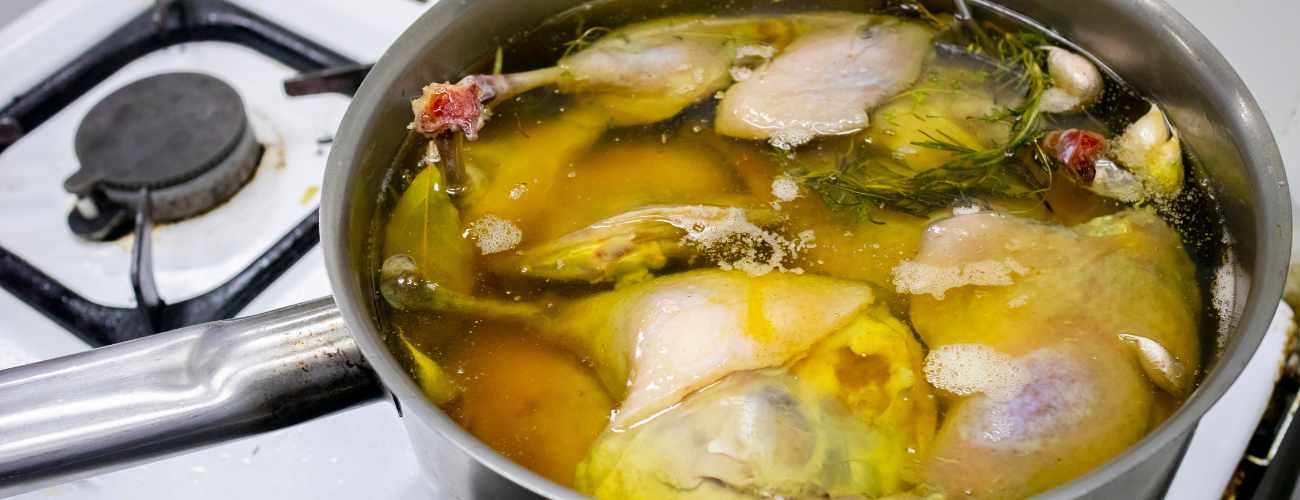
4. Preserving Meat in Fats and Oils
Preserving meat in fats and oils is a traditional and delicious method that not only enhances the flavour but also extends the shelf life of various meat cuts. This technique is particularly popular for creating flavourful and tender preserved meats, such as confit. Depending on the type of meat and the storage conditions, meat preserved in fats and oils can last in a refrigerator for several weeks to a few months.
Here are step-by-step instructions on how to preserve your meat in fats and oils:
1. Select the meat you wish to preserve. Common choices include duck, chicken, pork, or even fish. Fattier cuts work exceptionally well for this method.
2. Trim the meat, removing excess fat and bone. Cut it into manageable pieces, such as chicken thighs, duck legs, or pork belly.
3. Choose a stable fat for preservation. Duck fat, lard, or high-quality cooking oils like olive oil or vegetable oil work well. The choice of fat can significantly influence the flavour of the preserved meat. I recommend making a good investment into the fat or oil you will be using as it will be worth it!
4. In a saucepan, heat the chosen fat over low to medium heat. Submerge the meat pieces in the warm fat, ensuring they are fully covered. This slow-cooking method, known as confit, helps tenderize and preserve the meat.
5. If desired, add aromatic herbs and seasonings to the fat for flavour infusion. Common choices include garlic, thyme, rosemary, and bay leaves. These aromatic elements infuse the meat with wonderful tastes.
6. Once the meat is tender and thoroughly cooked, let it cool in the fat to room temperature. Transfer the meat, along with the infused fat, into airtight containers or sterilized glass jars. Seal the containers tightly.
7. Store the preserved meat in the refrigerator. The cool temperature will help maintain its quality and flavour. Ensure that the meat pieces are fully submerged in the fat to prevent air exposure.
8. Preserved meat in fats and oils can be a great addition to your culinary collection. Use it as a rich and flavourful ingredient in various dishes. It’s excellent for sandwiches, salads, pasta, or as a decadent garnish.
| Recipe: Duck Breast Preserved in Duck Fat |
| Ingredients | Quantity |
| Duck breast | 2 duck breasts |
| Salt | 2-3 tablespoons |
| Black pepper | 1 teaspoon |
| Fresh thyme | 3-4 sprigs |
| Garlic cloves | 4-6 cloves |
| Duck fat | Sufficient to cover duck breasts |
| —————————————— |
| Steps | Instructions |
| 1. Prepare the duck breasts: | Trim any excess fat from the duck breasts and season them with salt and black pepper. Allow them to sit in the refrigerator for at least 1-2 hours. |
| 2. Sterilize the containers: | Wash and sterilize glass or plastic containers with airtight lids. |
| 3. Add aromatics: | Place fresh thyme and garlic cloves at the bottom of the sterilized containers. |
| 4. Pack the duck breasts: | Place the seasoned duck breasts on top of the aromatics. |
| 5. Cover with duck fat: | Pour enough duck fat to completely submerge the duck breasts. Ensure there are no air pockets. |
| 6. Seal the containers: | Close the containers tightly to create an airtight seal. |
| 7. Store and preserve: | Store the containers in a cool, dark place or the refrigerator. The preserved duck breasts will last for several months to a year when properly stored. |
| 8. Enjoy: | When ready to use, remove the duck breasts from the duck fat. These preserved duck breasts can be pan-seared or roasted for a delicious, tender, and flavourful dish. Keep any opened containers in the refrigerator and consume within a reasonable time. |
| Shelf-Life Details |
| Properly preserved duck breasts in duck fat can last for several months to a year when stored in optimal conditions. Factors affecting shelf life include the quality of the duck breasts, the hygiene of the preservation process, and the storage conditions. Ensure that the duck breasts are fully submerged in duck fat to prevent spoilage. Store the containers in a cool, dark place or the refrigerator. Once opened, consume the preserved duck breasts within a reasonable time and keep them refrigerated. |
5. Fermenting Meat: A Preservation and Flavour Enhancement Technique
Fermenting meat is a time-honoured method that not only preserves meat but also infuses it with unique flavours and textures. The process can be done with both raw and cooked/partially cooked meat and offers the option to ferment meat alongside vegetables, creating amazing taste and textures.
Here’s your guide to fermenting meat:
Fermenting vegetables is a well-known preservation method but how about fermenting meat? If this is the first time you have heard about this method, don’t worry, I have you covered!
One interesting fact I have learned is that when you cook meat, you may lose certain B vitamins, while through the process of fermentation, you can increase the levels of these vitamins. This means that by fermenting, you may enhance the nutritional value of the food.
Here’s how it’s done:
1. Choose your preferred type of meat, such as beef, pork, or poultry. When using raw meat, it’s essential to choose high-quality cuts. The meat can be ground or used as whole cuts, depending on the recipe and preference.
2. To add depth and complexity to the flavour, season the cooked meat with a combination of spices and herbs. It’s essential to add salt. Salt not only enhances the flavour but also helps control the fermentation process by inhibiting the growth of harmful bacteria. Be mindful of the salt quantity, as it can impact the final taste.
3. To kickstart the fermentation process, you can use starter cultures that contain beneficial bacteria. These cultures are readily available and help ensure a controlled and safe fermentation.
4. While starter cultures are beneficial for controlled fermentation, they may not be necessary. In most cases, naturally occurring bacteria can facilitate the fermentation process especially when fermenting raw meat. It’s essential to be aware of the specific requirements for the type of meat you’re fermenting.
5. Place the seasoned, cooked or raw meat in a fermentation container, ensuring it’s tightly packed. Depending on the recipe, you can do a dry fermentation or moist where you add some liquid/brine rich in probiotics.
6. Cover the meat with cabbage leaves to prevent exposure to oxygen – proper sealing is essential to create an anaerobic environment that encourages the growth of beneficial bacteria while inhibiting the growth of harmful ones.
7. If desired, you can add vegetables such as garlic, onions, or peppers to the same fermentation container as the meat. These vegetables can enhance the flavour and texture of the final product, creating a delightful interplay of tastes.
8. The fermentation time for cooked meat can vary but often lasts for several days to a few weeks. Regularly monitor the process to ensure it’s progressing as expected.
9. After fermentation, store the meat in the refrigerator or a cool storage area. Fermented cooked meat can be enjoyed as a flavourful and tangy addition to various dishes.
I have written a blog about 5 indigenous food preservation methods in which I am discussing different preservation methods and I encourage you to read it if you are keen to learn more about meat preservation.
Fermenting meat, whether raw or cooked, alone or with vegetables, is a fascinating way to explore flavours and preservation. It offers a myriad of culinary options, and the choice between cooked and raw meat depends on your preference and the specific recipe you’re following. The best way is to try different methods to discover what your preferred option and flavour is. Good luck on your meat preservation journey!