When I first started on my journey to self-sufficiency, I couldn’t have been happier with my bountiful harvest. But soon, reality hit me – there was no way my family could eat all those veggies before they spoiled. So, what was my solution? Learning how to naturally preserve them, of course! In this blog, we’ll dive into all sorts of cool methods to make sure your homegrown veggies keep gracing your table year-round. Let’s get into it!
Naturally preserving vegetables encompasses several methods. Dehydration, through the gentle removal of moisture, concentrates flavors. Freezing acts as a temporal pause button, retaining freshness. Pickling infuses a zesty tang, while fermentation offers probiotic richness. Canning ensures enduring quality.
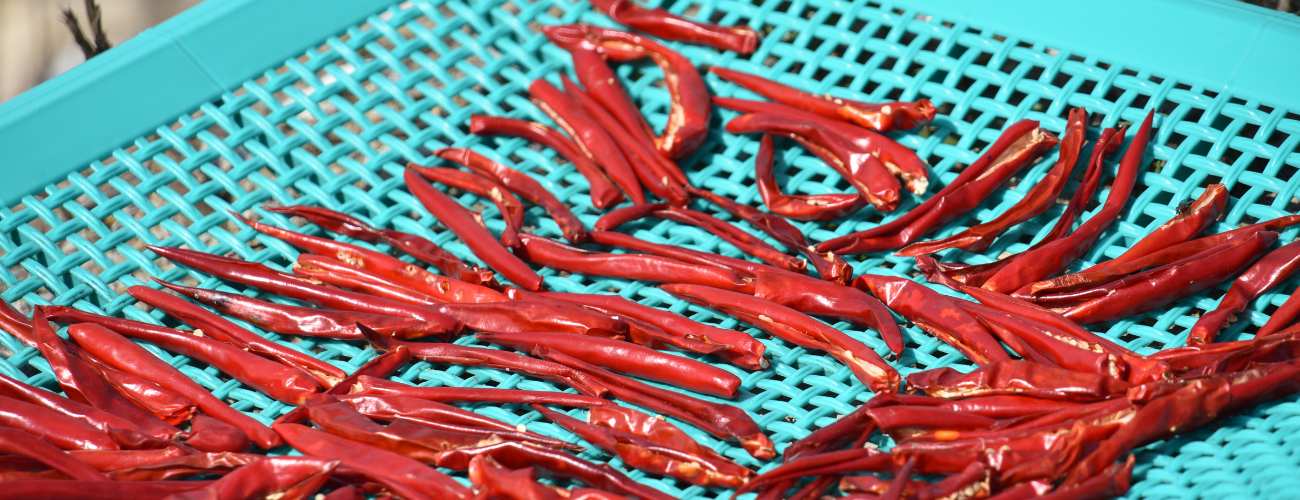
1. Preserving Your Harvest by Dehydrating
Dehydrating is not just about preserving vegetables; it’s about locking in their fantastic flavours and nutrients. It works by gently removing the moisture, leaving behind the pure essence of your veggies.
So, which ones are perfect for this? Think about sun-dried tomatoes that pack a punch in pasta dishes, or bell peppers and mushrooms that become amazing additions to soups and stews. And here’s a snack-worthy idea – homemade trail mix with dehydrated veggies.
A great tip is to convert some of these dried veggies into a powder, for example, chillies, peppers or cabbage and use them in cooking. You could also flavour oils with them. I love a little bit of homemade chilli oil.
It’s like a taste of summer all year round, and it’s super easy to do! Just grab those garden excesses or market bargains, fire up your dehydrator, and get ready to savour the goodness.
Here’s a step-by-step approach:
- Wash, peel (if needed), and slice your veggies into uniform pieces.
- Arrange them on your dehydrator trays, ensuring they’re not crowded to allow proper air circulation.
- Set the dehydrator to a temperature between 125-145°F (52-63°C), depending on the type of veggies.
- Let the dehydrator do its thing, checking periodically. Your veggies are ready when they’re leathery, not brittle.
- Store your dried goodies in airtight containers in a cool, dark place for long-lasting freshness.
Pro Tip: Invest in a dehydrator with adjustable temperature settings and a timer for convenience.
2. Preserving Your Harvest by Freezing
- Freezing your veggies is like hitting the “pause” button on their freshness, and it’s as easy as pie. Here’s how you do it:
- Wash, peel, and chop your veggies according to your recipe needs.
- Blanch them by quickly dunking them in boiling water and then giving them an ice bath. This trick helps keep their colour and flavour intact.
- After a good drain and a thorough pat-down, pop them into airtight containers or heavy-duty freezer bags. Pro tip: don’t overstuff the containers, and here’s a hack – freeze them separately first, so they don’t all stick together.
- Label your packages with the date – it’s your secret weapon for keeping track of freshness.
Now, here’s the kicker – reusable freezer bags. Not only are they eco-friendly, but they’ll also save you some serious cash in the long run. So, whether it’s your garden excess or those sweet market deals, make the most of it by freezing your veggies. It’s like having a freezer full of garden goodness at your fingertips!
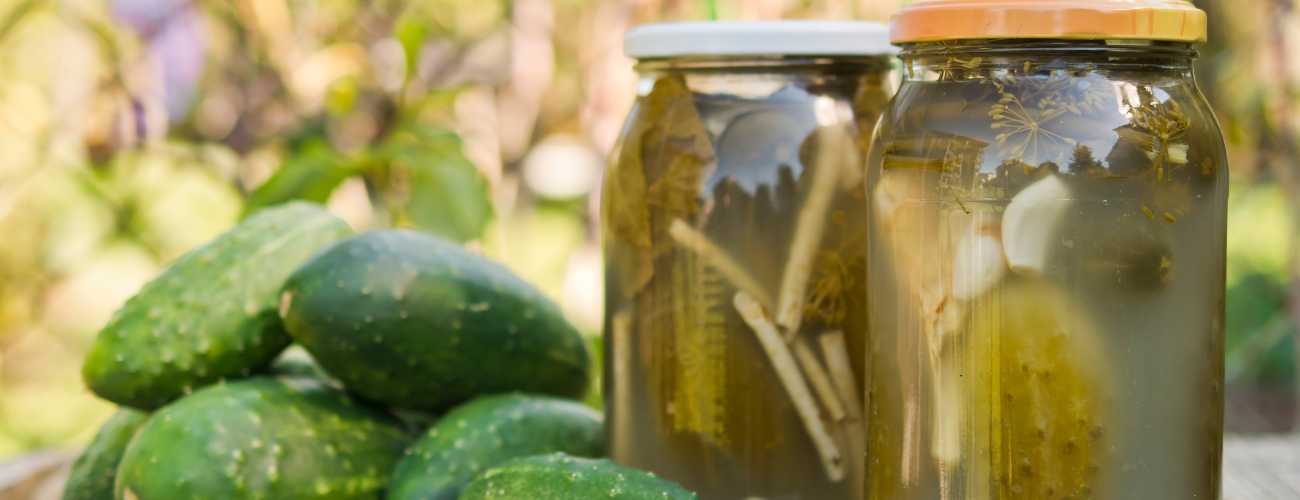
3. Preserving Your Harvest Pickling
Not everyone is a fan of pickles, I think it is one of those things which you either love or hate.
I am originally from Slovakia where pickles are much more popular than in the UK. I have grown up eating pickles, so I definitely love it!
- Start by whipping up a pickling brine – just mix vinegar, water, salt, sugar, and your choice of spices. Mustard seeds, peppercorns, or fennel are solid picks.
- After giving your veggies a good wash, stuff them into sterilized jars.
- Pour that tangy brine over your veggies, making sure they’re fully submerged.
- Seal the jars up and take a quick dip in a water bath for a few minutes. That’s it – you’re sealed and good to go!
Now, what veggies make the best pickles? Cucumbers, of course, but don’t stop there. Carrots, cauliflower, and even red onions take on a whole new life after a pickling bath. Plus, it’s not just veggies – you can pickle everything from beets to eggs. Get creative, and let your taste buds be your guide!
4. Fermenting: A Probiotic Adventure
Fermenting your vegetables is not only a preservation method but also a journey of flavour transformation. My favourite vegetables to ferment are cabbage, cucumbers, cauliflower and garlic which are bursting with flavour even more after the process.
Here’s how to ferment your vegetables:
- Begin with salt and water to create a brine. The salt percentage typically ranges from 3-5% of the total vegetable weight.
- Place a layer of salt at the bottom of your fermentation vessel and let it dissolve in filtered water.
- Add your veggies and top them up with more brine. To keep the vegetables submerged, use a weight or cabbage leaves.
- Cover your vessel with a clean cloth secured with a rubber band, allowing gas to escape.
- Let the fermentation process work its magic for about 5-7 days or longer for a tangier flavour.
- Remember to “burp” your jars every couple of days to release accumulated gas.
Pro Tip: Fermented vegetables can last for months when stored in the right conditions. Once opened, keep them in the fridge.
If you are wondering what else you could ferment, I recommend you to check out my blog where I am going into details what food you can ferment.
5. Canning: Water and Pressure Methods
Canning is your gateway to preserving the vibrant flavours of your homegrown vegetables, and there are two primary methods to master – water bath canning and pressure canning.
Water Bath Canning: Preserving the Goodness of High-Acid Foods
- Prepare your high-acid foods like tomatoes.
- Sterilize your canning jars and lids.
- Fill the jars with your prepared goodies.
- Submerge the filled jars in boiling water, ensuring they’re covered by at least an inch.
- Process the jars in boiling water for the recommended time, depending on your recipe.
- Carefully remove the jars and let them cool. As they cool, you’ll hear that satisfying “pop” of the lid sealing.
Pro Tip: Invest in a canning kit with a jar lifter and magnetic lid lifter for safer and more straightforward canning.
Pressure Canning: The Key to Low-Acid Preservation
- Prepare your low-acid foods like beans and corn.
- Sterilize your canning jars and lids.
- Fill the jars with your prepared low-acid wonders.
- Lock the lid securely on your pressure canner and follow the manufacturer’s instructions for adding water.
- Heat the canner to build pressure.
- Maintain the correct pressure level throughout the processing time.
- Allow the canner to cool naturally, then carefully unlock and remove the jars.
Pro Tip: Invest in a reliable pressure canner with a built-in gauge and safety features for peace of mind during the process.
I am delving into more details on the topic of canning in my blog, explaining how to preserve your garden harvest.
So, there you have it! Whether you’re saving your garden’s bounty or enjoying homegrown flavours all year, these techniques ensure your veggies stay fresh and delicious.