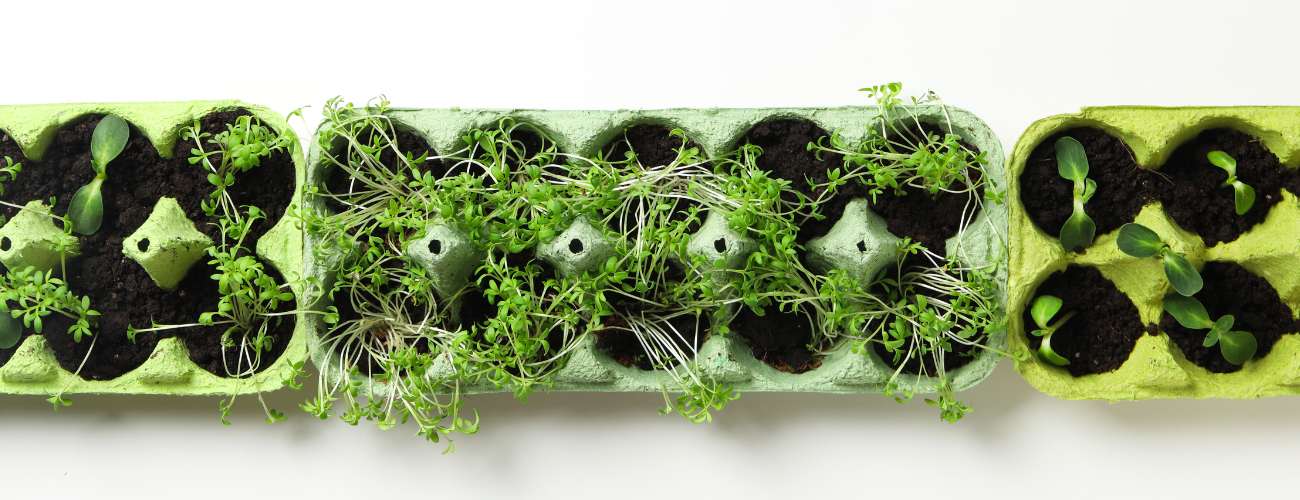
If you’re on the lookout for a more sustainable and budget-friendly approach to gardening, why not consider kickstarting your seeds in egg cartons? Not only does this reuse common packaging, but it also aligns with eco-conscious practices, helping you save money in the process. Are you wondering how?
As a whole, it is a simple process:
- Fill each egg cup with a seed-starting mix.
- Plant seeds according to packet instructions.
- Water lightly and cover with plastic wrap.
- Place in a warm and light spot for germination.
- Once sprouted, transfer to larger containers.
- Gradually acclimate to outdoor conditions.
If you have many more questions about this greener gardening method, you’re in the right place – stick around, and everything should fall into place.
Are egg cartons good for starting seeds?
Yes, egg cartons can be excellent for starting seeds if used in the right way. They provide individual compartments, promote easy transplanting, and are biodegradable. Ensure drainage, use seed-starting mix, and repurpose these containers for an eco-friendly and cost-effective seed-starting solution.
Let’s dive into each step of this journey to ensure you don’t miss any detail:
- Gather Your Materials:
- Choose cardboard or paper egg cartons for environmental friendliness.
- Ensure the cartons are clean and free from any residues.
- Get a great-quality seed-starting mix, preferably enriched with nutrients.
- Pick seeds that suit your space and taste.
- Have a watering can ready because thirsty plants are not fun to deal with.
- Prep those Egg Cartons:
- Trim or remove any extra bits, leaving just the cup sections.
- Stab some holes for drainage; plants don’t like wet feet.
- Fill with Seed-Starting Mix:
- Gently fill each cup with that lovely seed-starting mix, and give it a little pat-down.
- Leave a bit of room at the top to prevent a waterlogged mess.
- Plant Your Seeds:
- Refer to the seed packets for specific planting instructions regarding depth and spacing.
- Label each section with the type of seed and the date of planting.
- Think about creating a planting plan to maximize space and organization.
- Watering:
- Use a fine mist or a watering can with a gentle flow to moisten the seed-starting mix.
- Ensure even moisture without creating waterlogged conditions.
- Cover the cartons with plastic wrap if desired, creating a mini greenhouse effect for optimal germination conditions.
- Germination:
- Place the cartons in a warm and well-lit area, maintaining a consistent temperature for successful germination.
- Monitor the moisture level regularly, ensuring it stays within the desired range.
- Once seeds sprout, remove the plastic wrap promptly to prevent excessive humidity.
- Light Requirements:
- Position the cartons near a south-facing window to take advantage of natural light.
- Think about using grow lights if natural light is insufficient, adjusting their height to avoid leggy growth.
- Aim for a daily light exposure of about 16 hours to promote strong and healthy seedlings.
- Transplanting:
- As seedlings grow, check out their size and root structure.
- Transfer each seedling to a larger container or directly into the garden, ensuring plenty of space for further growth.
- Handle seedlings carefully, don’t stress them out!
Check out my blog about container gardening, if you are interested to learn more on how to grow vegetables in containers.
- Gradual Transition:
- Harden off seedlings by exposing them to the outside gradually.
- Start with a few hours in a sheltered location, protecting them from direct sunlight and windy weather
- Gradually increase the time of outdoor exposure over 7-14 days.
- Pay close attention to the weather, avoiding extremes that may shock the seedlings.
- Once acclimated, transplant the seedlings into the garden, encouraging a seamless transition into their new environment.
Best Seeds to Start in Egg Cartons
Egg cartons are suitable for starting a variety of seeds, especially those with similar germination and growth requirements. I have created a table for you with some excellent options for seeds to start in egg cartons:
| Herbs | Vegetables | Greens | Root Vegetables | Microgreens | Culinary Favourites |
| – Basil | – Tomatoes | – Swiss chard | – Radishes | – Radish microgreens | – Green onions |
| – Cilantro | – Peppers (bell peppers, chili peppers) | – Collard greens | – Carrots | – Sunflower microgreens | – Dill |
| – Parsley | – Lettuce | – Mustard greens | – Beets | – Pea shoots | – Fennel |
| – Chives | – Spinach | – Arugula | |||
| – Thyme | – Kale |
Don’t forget to think about the space available in each egg cup, the eventual size of the plant, and the time it takes for the seeds to germinate! A great tip is to group seeds with similar growth rates and conditions in the egg carton for ease of care and transplanting.
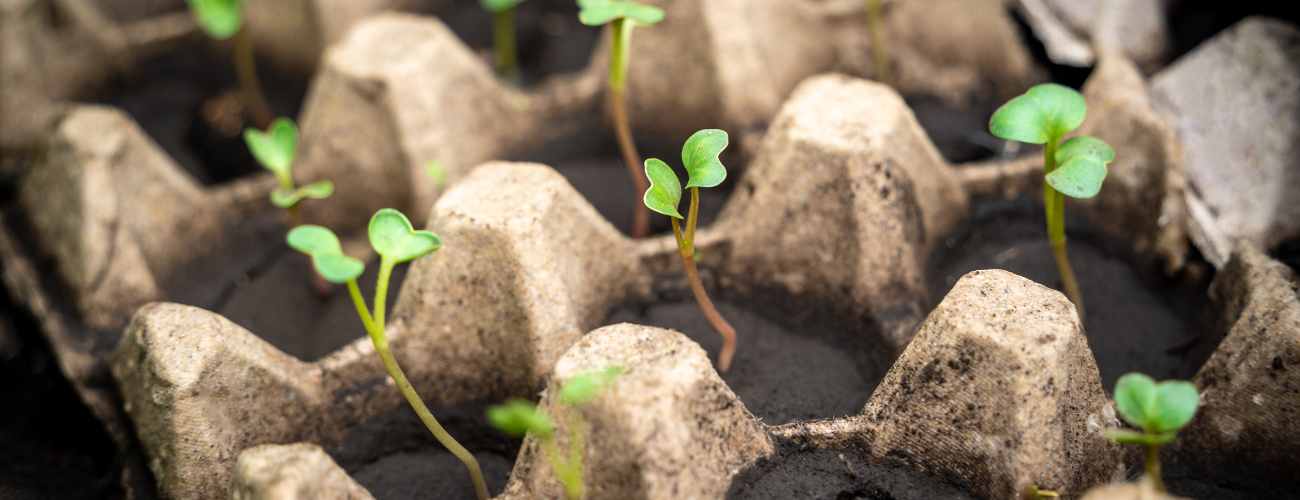
How Long Can Seedlings Stay in Egg Cartons?
Generally, seedlings can stay in egg cartons for a certain period, but it’s essential to transplant them before they outgrow the limited space. Ideally, you should move seedlings to larger containers or transplant them into the garden when they develop their first true leaves and are about 2-3 inches tall.
Leaving seedlings in egg cartons for too long can lead to several issues:
Root Overcrowding: Limited space in each egg cup can cause the roots to become tangled and overcrowded, delaying the plant’s growth.
Nutrient Depletion: The nutrients in the seed-starting mix may become depleted as the seedlings grow, affecting their health and growth.
Watering Challenges: The small size of the egg cups may make it challenging to water the seedlings adequately, leading to uneven moisture levels.
To ensure the success of your seedlings:
Monitor Growth: Regularly check the size of the seedlings and the development of their roots.
Transplant Promptly: Once seedlings show signs of outgrowing the egg cartons, transplant them into larger containers or directly into the garden.
Provide Adequate Space: Ensure that each seedling has enough space for its roots to expand and access sufficient nutrients and water.
Transplanting at the right time promotes healthy growth and reduces the risk of transplant shock. Remember to handle seedlings gently during the transplanting process to minimize any stress!
Seedlings in Egg Carton – Mould issues
Are you experiencing mould issues with your egg carton seedlings? Well, it’s important to address the problem as soon as possible to ensure the health of your plants. Mould can develop due to excessive moisture, poor air circulation, or the use of contaminated soil.
Here are steps to address and prevent mould growth:
Improve Air Circulation:
- Ensure proper ventilation around your seedlings. If indoors, use a fan on a low setting to circulate air.
- Avoid overcrowding seedlings, allowing for adequate space between them.
Monitor Moisture Levels:
- Water the seedlings carefully, keeping the soil consistently moist but not waterlogged.
- Allow the soil surface to dry slightly between watering to discourage mould growth.
- If using a plastic cover, remove it once seedlings have germinated to prevent excessive humidity.
Choose Well-Draining Soil:
- Use a high-quality seed-starting mix that provides good drainage.
- Avoid overwatering and ensure that water can drain freely from the bottom of the egg carton.
Adjust Watering Technique:
- Water the soil directly rather than overhead to prevent excess moisture on the plant surface.
- Consider bottom watering by placing the egg carton in a shallow tray of water and allowing the soil to absorb moisture from below.
Provide Plenty of Light:
- Ensure your seedlings receive sufficient light, either by natural sunlight or by using grow lights.
- Adequate light can help prevent damp conditions that favour mould growth.
I wrote a blog on: do you really need to use grow lights? This blog will help you to make an informed decision in case you are unsure if you need some.
Remove Mouldy Material:
- Carefully remove any mouldy or affected material from the soil surface.
- If the mould is extensive, consider transplanting healthy seedlings into fresh soil and containers.
- Regular checking, proper watering practices, and keeping a well-ventilated environment are key to preventing mould issues. Adjust these factors based on the specific conditions of your growing environment, and your seedlings should thrive without experiencing mould problems.
Can You Plant Egg Cartons in the Ground?
While the cardboard or paper material of egg cartons is biodegradable, it’s generally not recommended to plant them directly into the ground for several reasons:
Breakdown Rate: Egg cartons break down relatively slowly, especially in garden soil. This slow decomposition can interfere with the root growth of your plants.
Moisture Retention: The cardboard in egg cartons tends to retain moisture, potentially leading to overwatering or uneven soil moisture levels around your plants.
Nutrient Competition: As the egg carton breaks down, it may compete with plants for nutrients in the soil, affecting their overall health.
So, there you have it – the lowdown on starting your green adventure with egg cartons. It’s cheap, eco-friendly, and a fantastic way to get closer to your garden while recycling your breakfast leftovers. Happy egg carton gardening!