In the past few years, I have been on a mission to find ways to cook and preserve my family’s food naturally. I was glad to learn that it is very easy to preserve your harvested fruit naturally without any artificial additives.
Various natural techniques can be employed to preserve fruit effectively. These primary methods include freezing, dehydration (drying), and canning. In canning, natural preservatives such as sugar and lemon can enhance preservation, and the technique relies on heat to ensure long-term fruit preservation.
I will be getting into all of these techniques in much more detail, so grab yourself a drink and let’s get started.
The best techniques to preserve your fruit naturally
1) Freezing – In my opinion, the simplest method to preserve fruit naturally.
However, there are still some watch-outs and steps which you don’t want to miss!
Prep Your Fruit: Start by giving your fruit a good wash under cold water. Make sure you dry it off properly as any excess water can affect your fruit texture, flavour as well as fruit can stick together. If necessary, slice or chop it into pieces.
Flash Freeze: Lay out the fruit pieces on trays or baking sheets in a way that they aren’t touching each other. Place the trays in your freezer and let the fruit freeze solid for a few hours. This process is known as “flash freezing” and helps prevent the fruit from sticking together.
Pack and Label: Once your fruit is nicely frozen, transfer it into zip-top freezer bags or airtight containers. To avoid any guessing games later on, remember to label them with the date and the type of fruit you’ve frozen.
Store and Enjoy: Your frozen fruit can remain in good condition for up to a year. Simply keep them stored in your freezer.

2) Dehydration (drying) – another super simple method!
Prep Your Fruit: Wash and peel your fruit if you prefer, then slice it into even pieces. Thinner slices dry faster, while thicker ones give you a chewier snack – it’s all about your taste. The riper your fruit is, the sweeter the taste of dried fruit will be.
Optional Pre-Treatment: For some fruits like apples or pears, you can give them a quick dip in lemon juice or a honey-water mix. It adds flavour and keeps them from turning brown.
Arrange and Dry: Lay out your fruit slices on a dehydrator tray or a baking sheet lined with parchment paper. Make sure they’re not touching, so the air can flow around them.
Dehydrate: Set your dehydrator or oven to a low temperature (usually around 130-160°F or 55-70°C), and let them do their thing. It might take a few hours, but it’s worth the wait.
Check for Doneness: Your dried fruit is ready when it’s still a bit pliable but no longer sticky. Think of it like a tasty, chewy treat.
Cool and Store: Allow your dried fruit to cool down completely, then store them in airtight containers or resealable bags. Keep them in a cool, dry spot to maintain their chewiness.
I told you preserving fruit naturally is very simple!

3) Canning – requires more skillset than freezing or drying but is still actually very easy with a little practice.
Prep Your Fruit: Wash, peel, and slice your fruit as needed. Remove any pits, cores, or unwanted parts.
Prepare Syrup (Optional): If you want to can your fruit in syrup, make it by dissolving sugar in water. The syrup adds sweetness and helps maintain the fruit’s quality.
Fill the Jars: Pack your clean canning jars with the prepared fruit, leaving some space at the top.
Add Syrup (Optional): If you’re using syrup, pour it over the fruit, leaving the recommended amount of headspace. But remember, this step is optional, as some fruits can be canned without syrup.
Remove Air Bubbles: Gently tap the jars to release any trapped air bubbles. This ensures your jars seal properly.
Wipe the Jar Rims: Use a clean, damp cloth to wipe the rims of the jars to remove any residue. A clean rim is crucial for a good seal.
Seal the Jars: Place sterilised lids on them and secure them with screw bands. Don’t tighten them too much; finger-tight is just right.
Process the Jars: Process the jars accordingly depending on the fruit and your canning method (water bath or pressure canning). Follow the specific instructions for your canner.
Cool and Test Seals: After processing, let the jars cool on a clean towel or rack. Listen for that satisfying “pop” as the lid’s seal. Check for proper sealing by pressing the centre of the lids; they should be concave and not pop back.
Label and Store: Label your jars with the contents and date. Store them in a cool, dark spot. Properly canned fruit can stay good for a year or more.
If you think this method sounds complicated, trust me it is not – just have a go and you will be surprised how straightforward it is!
Other ways of preserving your tasty fruit naturally
Apart from freezing, drying, and canning, there are more fun and flavourful ways to naturally preserve your favourite fruits.
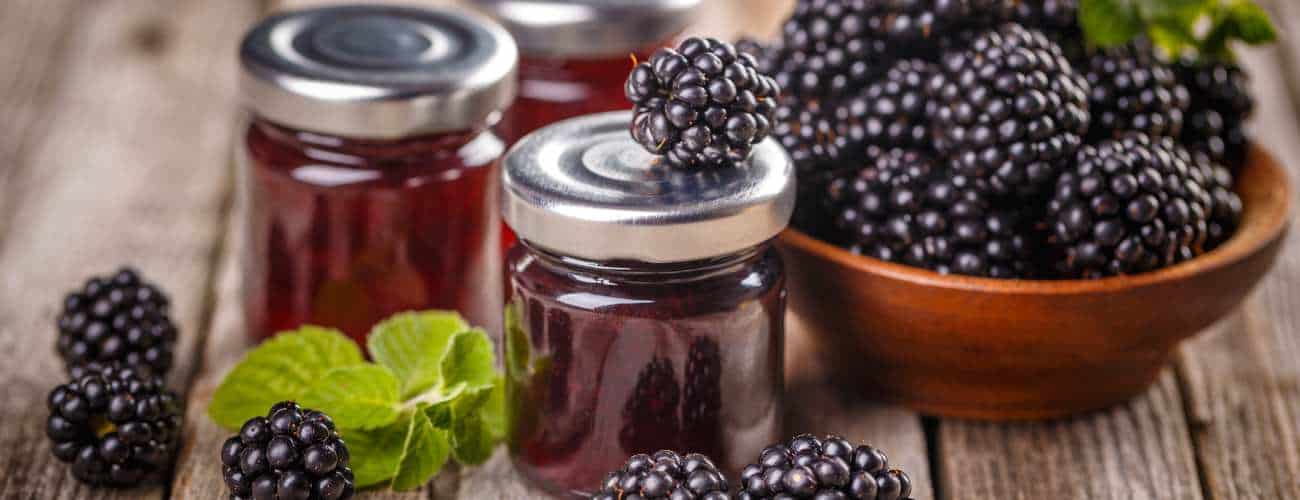
One tasty method which I love is whipping up fruit preserves or jams, where you cook your fruit with sugar to create a spreadable treat. What could be better than spreading a reminder of your favourite summer fruits on your toast during the winter months?
If you’re feeling adventurous, try fermenting fruits into preserves or chutneys, giving your palate a zesty, complex surprise that pairs wonderfully with savoury dishes.
And for those who want to savour the essence of their fruits without changing their texture, consider making fruit vinegar infusions. These infusions add a burst of fruity goodness to salads, dressings, and marinades.
Plus, you can get creative by preserving fruits in alcohol and crafting lovely liqueurs and flavour extracts that add a dash of fruity magic to cocktails and dishes. These alternative methods make preserving fruit an exciting culinary adventure, allowing you to enjoy nature’s sweetness year-round with your own personal twist!
I have written blogs on how to preserve apples and pumpkins naturally. I encourage you to check these out if you are growing this kind of fruit and are wondering how to preserve it.
How to make your naturally preserved fruit even better?
For those wanting to up their fruit preservation game, think about going organic and supporting local growers. It’s a win-win! Not only will you get fruit that’s fresher and bursting with flavour, but you’ll also be backing sustainable farming and doing your bit to shrink that carbon footprint.
Plus, understanding when your favourite fruits are in season in your local area can help you plan your preservation projects like a pro. And don’t forget to get adventurous with the heirloom and unique fruit varieties. They’ll add a dash of excitement to your preservation journey, letting you savour a whole bunch of awesome flavours.
So, whether you’re just starting or a seasoned pro, these tips can take your fruit preservation skills to the next level!